To watch satellite TV on your PC with XBMC and MythTV, you’ll need at least one satellite TV tuner card or a satellite provider that offers satellite IPTV access. That Linux TV card hardware doesn’t have to be installed on the same computer on which you want to watch HDTV. We’ll call the computer with the tuner hardware the backend. The computer used to view TV will be called the frontend. The backend and frontend can be one and the same machine. XBMC will be run on the frontend on linux
TBS6925 PCI-E DVB-S2 Card is a new released professional satellite TV tuner card, which is regarded as one of the best TV tuner card for Mythtv or linux. This mythtv TV card can capture 16 APSK and 32APSK Demodulator. It also supports CCM, VCM, and ACM mode at the same time. The key feature is that TBS 6925 can receiver multiple Transport Stream and Generic Stream .it even can support up to 190 Mbit/s channel bit rate capture. TBS has updated Linux tv tuner drivers which supports all kernels up to 2.6.38, which enable users to freely watch or record HD FTA satellite with XBMC and MythTV in Linux, especially the HD Mediaset channels
As far as we know, XBMC currently supports the following backends:
- HTS Tvheadend
- VDR
- MythTV
- MediaPortal
- ForTheRecord
So, if you want to run the TV card on Linux, You’ll have to install (at least) one of them.
Set up MythTV on Linux
1. Set up your TV tuner card as DVB type in mythtv-setup’s. On the capture card setup page, you will see a button called “DiSEqC.” Highlight it and press enter. Start with a blank screen and the word “(Unconnected).” Highlight “(Unconnected)” and press enter. You will see a list of DVB hardware myth can manage. Select “Switch.”
2.On the switch configuration screen, give your switch a name. In the example, the switch is called “DiSEqC Switch.” Set the type to “DiSEqc” For “Number of ports,” Choose the number of LNB ports your switch has. Choose “Finish.”
3. You will now see your switch represented in the graph, and an “(Unconnected)” node for each port. We will set up an LNB on Port 1. Choose the first port in the list and press enter. Choose “LNB.”
4. Give the LNB a unique name (a good choice would be the name of the satellite it is aimed at). Choose the LNB Preset type for your locale and select “Finish.”
5. Escape out to the top MythTV-setup menu. Enter the “3. Video Sources” menu. Set up a new listings source for each orbital location even if they are all from the same provider. You can use EIT or any normal Myth grabber.
6. Escape out to the top Mythtv-setup menu. Enter the “4.Input connections” menu. Highlight your TBS6925 card and press Enter. You will see a screen unique to DiSEqC setup. Select the DiSEqC switch port with the LNB we are setting up (in the example, port 1).
7. Continue to the next page. Set the video source to the source you set up for this orbital location. When you are satisfied with the settings, highlight and select “Scan For Channels.”
8MythTV will default to the “Tuned Scan.” You will need the transponder frequencies, polarities, and symbol rates for each transponder you wish to scan. If the scan fails, check your dish pointing and/or settings and try again. When the transponder has finished scanning, you can press “Back,” and attempt a “Full Scan of Existing Transports” scan type.
Set up XBMC on Linux
XBMC Media Center includes a media source that can communicate with a MythTV backend using the Myth Protocol and MySQL database queries to the mythconverg database. This requires that the MythTV configuration is checked to ensure XBMC will be able to communicate with MythTV, which depends on whether XBMC is running on the same machine.
To communicate with a MythTV backend, add a new Source from the Videos section. The source should have a URL that looks like: myth://username:password@i.p.address This URL needs to be specified manually as many skins don’t support the ability to configure a MythTV source.
When you select the newly added MythTV media source five folders will be listed:
- All Recordings – to watch anything that has been recorded all in one folder.
- Guide – to view the EPG for a channel
- Live Channels – to display what is currently being aired
- Movies – to list the movies that have been recorded
- TV Shows – to list each series of TV shows that have been recorder
Watching Live TV
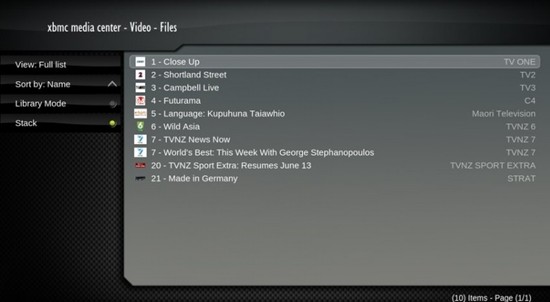
After choosing Live Channels a listing of the channels used by MythTV is displayed.
When a channel is chosen, the currently playing TV show on that channel is shown.Note that channel changes can take some time depending on the DVB-S2 tuner card and configuration being used by MythTV.
Viewing the Electronic Program Guide (EPG)
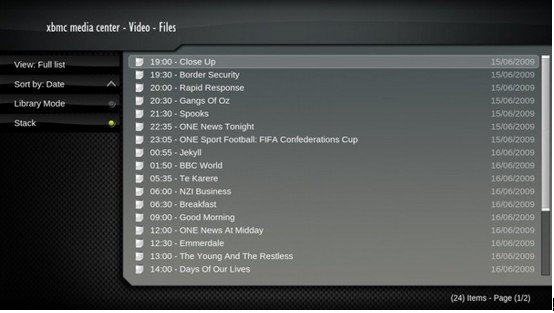
After choosing Guide a listing of channels used by MythTV is shown.When a channel is chosen, the listing of upcoming programs on that channel is displayed.
There is a future project to be able to schedule programs to record from the EPG similar to the functionality available in the MythTV frontend.
The last thing is to enjoy the HD satellite programs as you like. That is to say, TBS 6925 would be a perfect TV tuner card for Mythtv .You should never miss it.
Ready to Buy TBS6925?
1.TBS 6925- Most Professional Satellite TV tuner Card


